


Mosaic tiles are a popular choice for adding texture, color, and pattern to walls, floors, and back splashes. The small size and intricate designs of mosaic tiles make them versatile and customizable, but they can also be a bit tricky to install. In this blog, we'll take a look at seven common mistakes people make when installing mosaic tiles and how to rectify them.
Mistake #1: Not Preparing the Surface Properly
One of the most critical steps in any tiling project is preparing the surface to which the tiles will be applied. Please prepare the surface properly to avoid tiles that don't adhere properly or are uneven.

Solution:
Before beginning any mosaic tile installation, it's important to make sure the surface is clean, dry, and smooth. Remove any old tiles, paint, or adhesive, and sand any rough spots or bumps.
If you're working with a particularly challenging surface, such as a concrete basement floor or a bathroom wall that has been exposed to moisture, it's a good idea to use a primer or sealant before tiling. This will help the tiles adhere properly and prevent any moisture damage in the future.
Mistake #2: Not Mixing the Mortar Properly
Mortar is the adhesive that holds the tiles in place, and it's essential to mix them properly. One common mistake is not mixing the mortar thoroughly enough, which can result in lumps or inconsistencies in the adhesive. Another mistake is mixing too much mortar at once, which can cause it to dry out before you have a chance to use it.

Solution:
To avoid these issues, make sure to mix your mortar according to the manufacturer's instructions, using the right amount of water and mixing it thoroughly. It's also a good idea to mix small batches of mortar as needed, so you don't waste any or end up with dried-out adhesive.
Mistake #3: Not Using the Right Tools
Mosaic tile installation requires a few specialized tools, such as tile nippers, a notched trowel, and a grout float. Using the wrong tools can make the job more difficult and result in uneven or poorly installed tiles.

Solution:
To ensure a smooth installation, make sure you have all the necessary tools before beginning your project. If you need help determining which tools you need, consult with a professional or watch a few online tutorials to understand the process better.
Mistake #4: Using Too Much Adhesive
When it comes to mosaic tile installation, less is often more. Using too much adhesive can result in too high or uneven tiles, making it difficult to achieve a level surface. It can also be messy and wasteful, as the excess adhesive will need to be cleaned up later.
Solution:
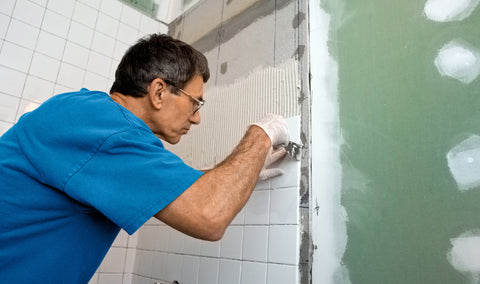
To avoid using too much adhesive, use a notched trowel to apply a thin layer of mortar to the surface before laying the tiles. This will ensure that the tiles are evenly spaced and level without creating excess adhesive that will need to be cleaned up later.
Mistake #5: Not Taking Care of Tile Placement
Mosaic tiles come in many different shapes and sizes, which can make it challenging to achieve a consistent pattern or design. One common mistake is not taking care of tile placement, which can result in uneven, crooked, or not matching the surrounding tiles.

Solution:
To ensure that your tiles are placed correctly, take your time and use spacers to maintain even spacing between tiles. If you're working with a design or pattern, use a straight edge or level to ensure that each tile is placed in the correct position.
Mistake #6: Rushing the Grouting Process
Grouting is the process of filling in the gaps between tiles to create a smooth, even surface. It's an essential step in the mosaic tile installation process, but it's important not to rush the process. Rushing can result in incomplete grout lines, uneven grout distribution, and even damage to the tiles themselves.

Solution:
To ensure a smooth and even grouting process, make sure to wait the recommended amount of time after laying the tiles before beginning to grout. Then, use a rubber grout float to spread the grout evenly, taking care to fill in all of the gaps between tiles. After applying the grout, allow it to set for the recommended amount of time before wiping away any excess with a damp sponge.
Mistake #7: Not Sealing the Grout
Once the grout has dried, and the tiles are in place, it's important to seal it to protect it from moisture, stains, and damage. Unfortunately, many people overlook this step, assuming that the grout will be fine on its own. However, failure to seal the grout can result in discoloration, mold growth, and even grout deterioration over time.

Solution:
To seal your grout, apply a sealer according to the manufacturer's instructions. This may involve using a spray bottle or a brush to apply the sealer evenly to the grout lines. Allow the sealer to dry completely before using the tiled area.
The Bottom Line:
In conclusion, installing mosaic tiles can be a fun and rewarding DIY project, but it's important to take the time to do it right. By avoiding these common mistakes and taking care of each step of the installation process, you can achieve a beautiful and durable tiled surface that will last for years to come. Always follow the manufacturer's instructions and consult a professional if you're unsure about any aspect of the installation process.