
Introduction
Grouting tile is an essential step in any tiling project, as it not only enhances the aesthetics of the tiles but also ensures their durability and longevity. Whether you're a seasoned DIY enthusiast or a newbie to tiling, learning how to grout tile is a valuable skill to have. In this comprehensive guide, we will walk you through the entire process of grouting tiles, from preparation to finishing touches. So, grab your tools and let's get started!
Table of Contents
-
Gather Your Supplies
-
What you'll need
-
-
Prepare the Surface
-
Cleaning and Inspection
-
Masking and Protecting
-
-
Mix the Grout
-
Choosing the Right Grout
-
Mixing Instructions
-
-
Apply the Grout
-
Tools for Application
-
Proper Technique
-
-
Clean Up Excess Grout
-
Timing is Crucial
-
Cleaning Tips
-
-
Cure and Seal
-
Importance of Curing
-
Sealing for Protection
-
-
Final Inspection
-
Checking for Imperfections
-
Touch-Up Work
-
-
Maintenance Tips
-
Keeping Your Grout Pristine
-
-
Troubleshooting Common Issues
-
Cracks and Discoloration
-
Repairing Damaged Grout
-
-
Frequently Asked Questions (FAQs)
Gather Your Supplies
What you'll need:
Before you begin the grouting process, it's essential to gather all the necessary supplies. You'll need:
- Grout: Choose a high-quality grout that suits your project and tile type.
- Grout Float: This tool is used for spreading grout evenly.
- Grout Sponge: Used for cleaning excess grout from tiles.
- Buckets: For mixing grout and water.
- Mixing Paddle: Attach it to a power drill for efficient grout mixing.
- Rubber Gloves: Protect your hands from grout and chemicals.
- Safety Glasses: Shield your eyes from potential splashes.
- Tile Spacer: For maintaining consistent grout lines.
- Tile Sealer: To seal the grout after it cures.
Prepare the Surface
Cleaning and Inspection:
Before applying grout, ensure that the tile surface is clean and free of debris. Remove any dust, dirt, or adhesive residues from the tile joints. Inspect the tiles for any cracks or loose pieces, as these issues should be addressed before grouting.
Masking and Protecting:
Use masking tape to protect adjacent surfaces such as walls or countertops. This prevents grout from accidentally spreading where it shouldn't be. Additionally, cover any nearby surfaces to prevent staining.
Mix the Grout

Choosing the Right Grout:
Selecting the right grout color is crucial as it can significantly impact the final look of your project. Consider whether you want the grout to blend in or contrast with the tiles. Consult with your tile supplier if you're unsure.
Mixing Instructions:
Follow the manufacturer's instructions on the grout packaging for mixing ratios and water-to-grout proportions. Use a bucket and a mixing paddle attached to a power drill for efficient and lump-free mixing.
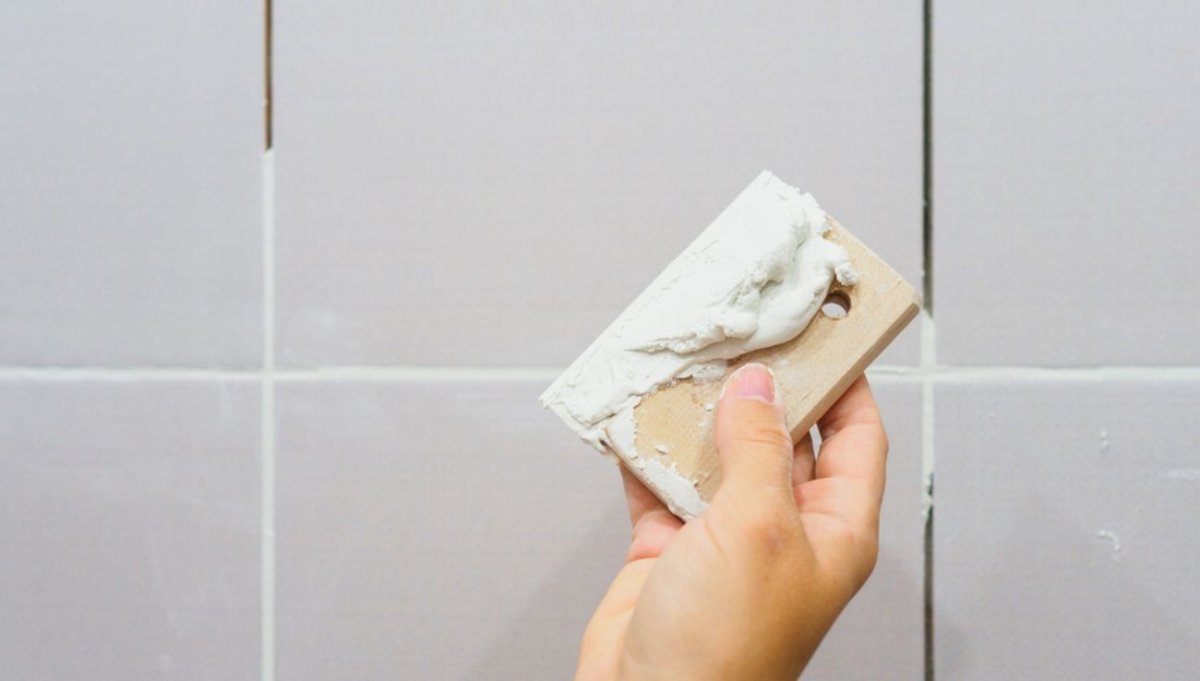
Apply the Grout

Tools for Application:
Use a grout float to apply the mixed grout to the tile surface. Hold the float at a 45-degree angle and press the grout into the tile joints, ensuring they are completely filled.
Proper Technique:
Work in small sections to prevent the grout from drying before you can clean it. Hold the float at a slight angle and use diagonal strokes to spread the grout evenly. Continue until all tile joints are filled.
Clean Up Excess Grout
Timing is Crucial:
After applying the grout, wait for about 15-30 minutes to let it set slightly. Use a damp grout sponge to clean off excess grout from the tile surface. Rinse the sponge frequently to avoid smearing grout onto the tiles.
Cleaning Tips:
Gently wipe the tiles in a circular motion to remove haze and achieve a smooth finish. Avoid pressing too hard to prevent grout removal from the joints. Allow the grout to cure for the recommended time.
Cure and Seal
Importance of Curing:
Proper curing is essential for grout to achieve its full strength and durability. Follow the manufacturer's guidelines for curing time, typically around 24-72 hours. Keep the area moist during this period.
Sealing for Protection:
After curing, apply a tile sealer to protect the grout from moisture and stains. This step is especially important in areas prone to spills or high humidity, such as kitchens and bathrooms.
Final Inspection
Checking for Imperfections:
Once the grout has fully cured, inspect the tiled surface for any imperfections, such as cracks or gaps. Address any issues promptly with touch-up work using fresh grout.
Maintenance Tips
Keeping Your Grout Pristine:
To maintain the beauty and longevity of your tiled surface, clean it regularly with a mild pH-neutral cleaner. Avoid abrasive cleaners that can damage the grout.
Troubleshooting Common Issues
Cracks and Discoloration:
If you notice cracks or discoloration in your grout over time, you can repair these issues with grout filler or colorant. Follow the manufacturer's instructions for the best results.
Frequently Asked Questions (FAQs)
-
How long should I wait before sealing the grout?
- Typically, you should wait at least 48 hours after grouting before applying a sealer.
-
Can I change the grout color after it's dried?
- Yes, you can use a grout colorant to change the color of dried grout.
-
What's the best way to clean grout stains?
- Use a mixture of baking soda and water or a commercial grout cleaner to remove stains.
-
How often should I reseal grout?
- It's recommended to reseal grout every 1-2 years, depending on usage and exposure to moisture.
-
Can I grout over old grout?
- While it's possible, it's usually better to remove the old grout and apply fresh grout for better adhesion and a cleaner finish.
Conclusion
Grouting tile may seem like a meticulous task, but with the right tools and knowledge, it can be a rewarding DIY project. Properly grouted tiles not only look stunning but also stand the test of time. Remember to follow each step carefully, from surface preparation to curing and sealing. By doing so, you'll enjoy beautiful and durable tiled surfaces for years to come.